The Mission
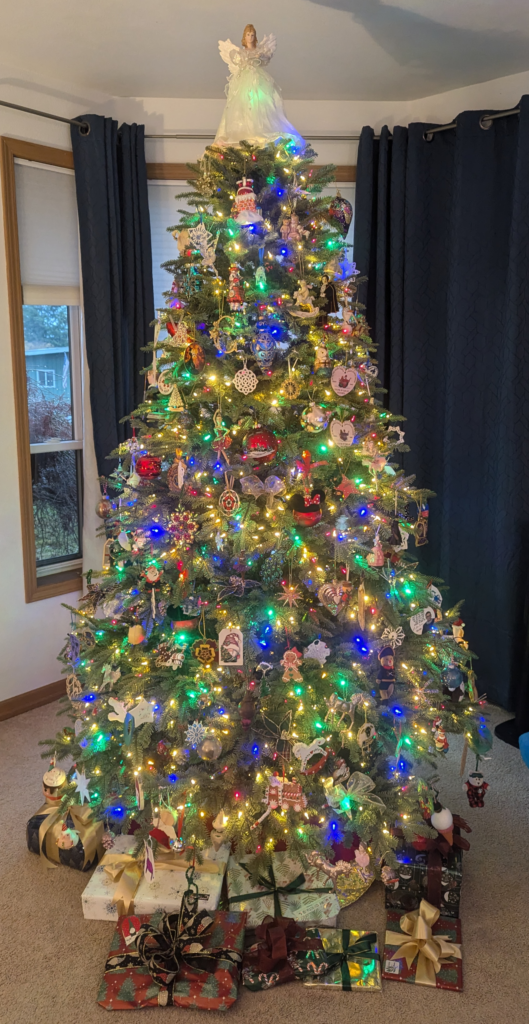
This year, having finally grown tired of the hassle and expense of buying a real Christmas tree every year and meticulously arranging both color and white lights all over it, my wife and I decided to splurge on a high-quality Balsam Hill artificial tree with pre-installed color and clear (warm white) LED lights. One of the first things I personally happened to notice while setting it up was that there it has a remote for controlling the power and color mode. Obviously, me being me, I had no choice but to integrate this into our extensive home automation system so we could control it with our Amazon Alexas (as well as hide the factory remote to keep the kids from getting their hands on it and messing around with the lights).
The Remote
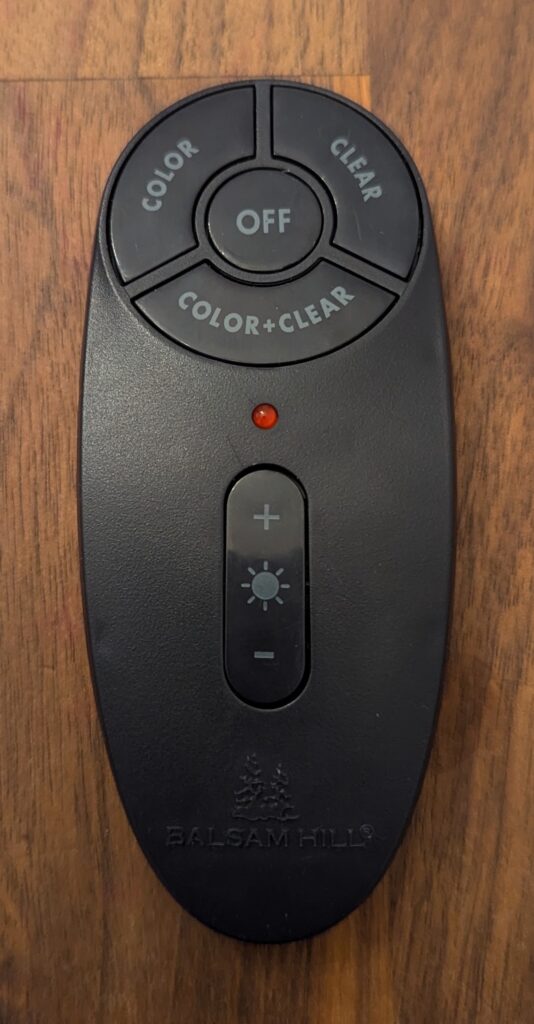
Upon examination of the CR2032-powered remote, I found no visible LED emitter, which suggested it was an RF remote (which makes sense, considering the receiver is part of the power cord assembly for the whole tree and is likely to be hidden behind the tree or under a tree skirt or something of that nature). And then there was the FCC ID of 2A62O-CW003 listed on the back (which turns out to be just a change in identification from FCC ID 2APJZ-CW003). A quick lookup of that ID on fcc.io showed that it operated on a frequency 434.000 MHz, which confirmed my suspicions. (Side note: it turns out that it doesn’t transmit on precisely 434.0000 MHz, despite what the fccid.io page said, but a bit closer to 433.90 MHz, according to my RTL-SDR. But the 433 MHz band is actually centered around 433.92 MHz, so the very tiny difference didn’t actually make any difference for my project.)

The Approach
I have a bit of familiarity with 433 MHz systems from integrating an RTL-SDR receiver using rtl_433 to capture weather station data from various points inside and outside our house, so I started devising a plan. I knew 433 MHz transmitters for IOT-type projects are cheap and readily available, so I quickly settled on a plan to use a 433 MHz transmitter wired to an ESP8266 or ESP32 board, most likely running Tasmota or ESPHome (since I currently use both of those firmwares in my home automation ecosystem), programmed to transmit the right RF signal when instructed by my OpenHAB hub.
The first thing to do was to see if anyone else had already done this. A bit of googling didn’t turn up any other projects involving Balsam Hill trees specifically, so I expanded my search parameters a bit to start looking for other projects that had a similar concept: a custom something-or-other to transmit 433 MHz signals from a microcontroller. Bonus points if they included how to capture and reverse engineer the signals from a proprietary RF remote.
Research & Learning
I don’t intend for this to be a step-by-step tutorial for capturing 433 MHz signals and determining how to replay them – there are already some really good resources for that out there. So I’m going to drop some links and gloss over the nitty-gritty details and explain at a high level what I did, and then go into the details of my custom integration.
So, here are some resources:
- Articles
- Receiving and decoding 433 MHz radio signals from wireless devices (using Gqrx)
- Poor man’s 433MHz RF Sniffer (includes using Audacity for decoding)
- Hardware
- Software
- Gqrx SDR (to inspect the radio spectrum and capture the messages)
- Audacity (to visually inspect the captured data and decode by eye)
- ESPHome (powerful Home Automation/IOT firmware for a variety of microcontrollers and peripherals)
- OpenHAB (open source Home Automation hub)
- ESPHome binding for the Native API (easier integration between ESPHome devices and OpenHAB)
Reverse Engineering, Take 1
At first, I was hoping this was going to be relatively straight-forward. My plan was to hook up a simple 433MHz receiver to an NodeMCU ESP32s dev board (it’s what I had handy), enable the remote_receiver component in ESPHome and record what it picked up while I tried different buttons on the remote, then essentially just feed those captured signals back to the remote_transmitter component and call it a day. Alas, there was a flaw in my plan: the cheap 433 MHz receivers I bought off Amazon basically just output noise on the data pin if they’re not receiving any actual transmissions. I spent a couple hours trying, but ultimately I couldn’t find an easy way to filter the wheat from the chaff – I just wasn’t able to identify the signals I was interested in amongst all the noise from the raw dump from ESPHome.
Reverse Engineering, Take 2
I was staring to get a bit discouraged when it dawned on me that I have an RTL-SDR receiver that I’ve been using with my outdoor temperature/humidity sensors. So, I went and grabbed the RTL dongle from my OpenHAB server and brought it over to my laptop so I could play around with it (knowing exactly how cold it was outside my front door isn’t terribly critical for me, so I was fine with borrowing it for this.
The first thing to try was to see if the software I was using to pick up the transmissions from my weather sensors, rtl_433, already knew about whatever protocol or format the Balsam Hill remote used. Alas, that didn’t seem to be the case – I didn’t get anything from it when I pressed buttons on the remote. Onward…
Capturing Raw RF Data
Undeterred, I moved onto the next step – capturing the radio signals from the remote and decoding them myself. To do this, I used a program called Gqrx that I had stumbled upon in my research. It wasn’t long before I had something I could work with.
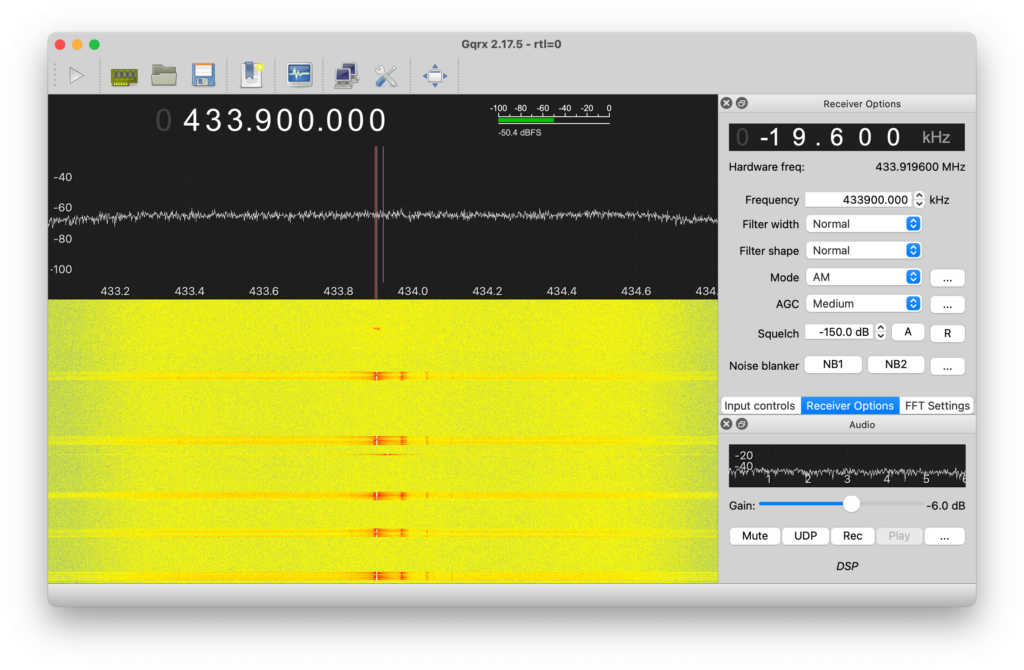
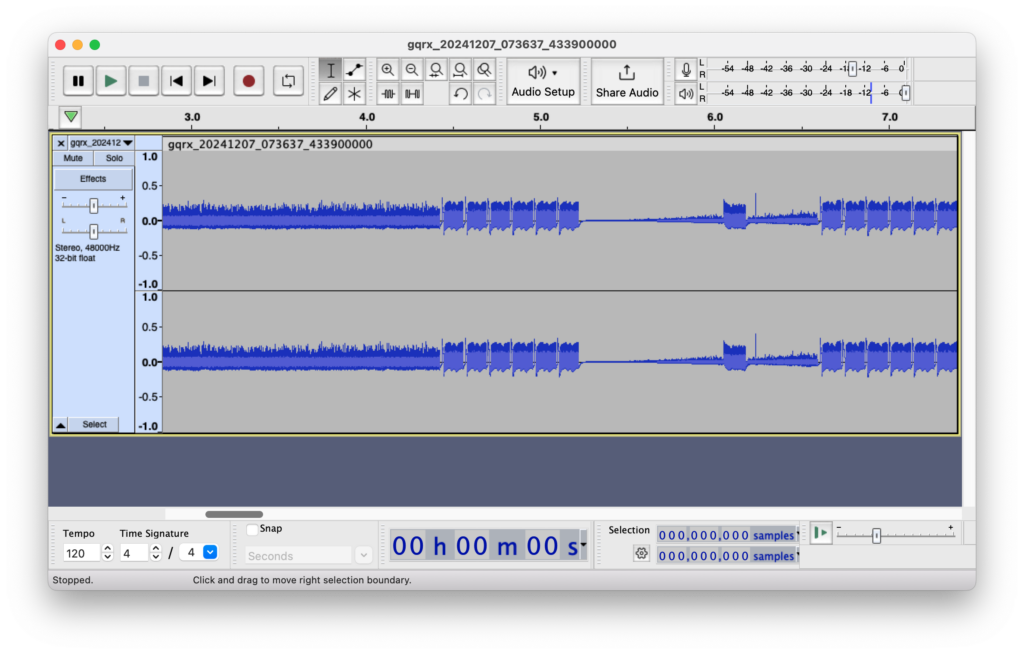
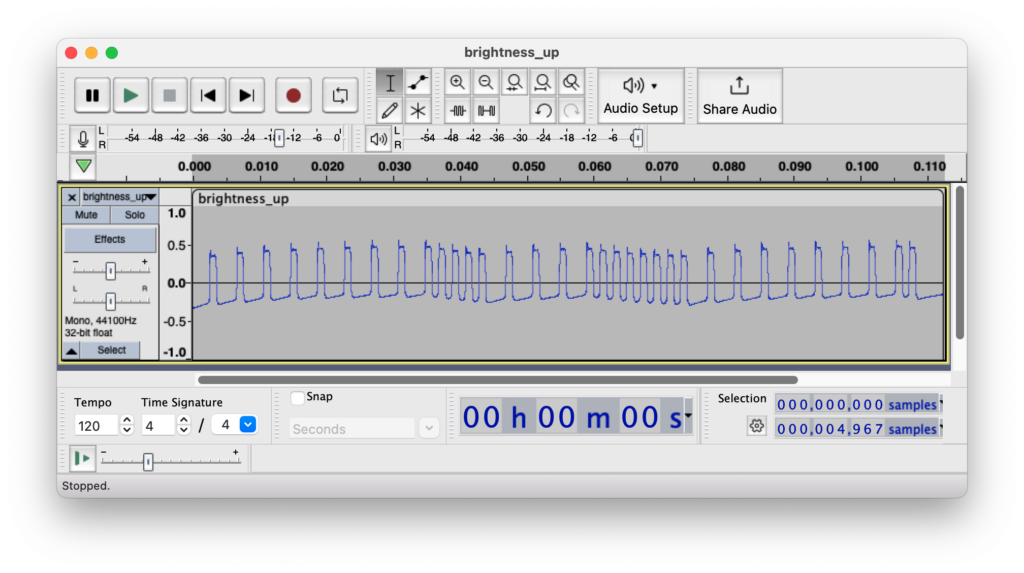
From there, I saved the raw WAV data from the RTL-SDR for each button press and, following a few other blogs I found, loaded them up in Audacity to see what the data actually looked like. Here is what I found:
Decoding RF Data
Following those other blogs I mentioned above, I determined that the buttons had the following bit patterns, repeated 6 times, with what may be a start sequence of some kind as well. There’s a pretty obvious pattern to the sequences.
| Button | Bit Sequence | Hex Value |
|---|---|---|
| Color & Clear | 00000000 11110000 11111010 00000101 | 0x00F0 FA05 |
| Clear | 00000000 11110000 11111011 00000100 | 0x00F0 FB04 |
| Color | 00000000 11110000 11111100 00000011 | 0x00F0 FC03 |
| Off | 00000000 11110000 11111101 00000010 | 0x00F0 FD02 |
| Brightness Up | 00000000 11110000 11111110 00000001 | 0x00F0 FE01 |
| Brightness Down | 00000000 11110000 11111111 00000000 | 0x00F0 FF00 |
That table was based on my semi-educated guess that a short high pulse followed by a long low pulse meant 0 and a short high pulse followed by a short low pulse meant 1. It could have been the other way around, but I wouldn’t know until I tried…fortunately it turned out my initial guess was correct. Also, note that the first 4 bytes were always the same, and bytes 7-8 were simply the inverse of bytes 5-6.
The Decoded Bit Patterns
Since this didn’t seem to correspond to any known protocol supported by ESPHome’s remote_transmitter component, I worked out the timings (about 1000 or 3000 µs, based on the 44.1 KHz sample rate and the number of samples for each high and low) and put together the correct sequence of values for transmitting the signal using transmit_raw. It did take a bit of trial and error to get the timings close enough to work (at one point I had a wait_time of 25 µs set, which I thought was the delay between repeats, but turned out to be the delay between bits, so the transmitted signal from ESPHome was way off from the real thing – fortunately that was a quick and easy fix).
I ended up using 1024 and 3072 instead of 1000 and 3000, since I figured they were more likely to be counting in powers of 2 and not 10. I did some post-deployment capture tests and 1000/3000 does seem to be closer to the real timings, but I haven’t bothered to update my configuration since what I have is working fine (it appears the receiver isn’t too strict on timings).
ESPHome Configuration
Here is the YAML I ended up using for using ESPHome on a Wemos D1 ESP32.
substitutions:
  device_name: balsam-hill-tree
  device_name_u: balsam_hill_tree
  friendly_name: "Balsam Hill Tree"

packages:
  common: !include common/common.yaml
  network: !include common/network.yaml

esphome:
  name: ${device_name}
  friendly_name: ${friendly_name}

esp32:
  board: wemos_d1_mini32
  framework:
    type: arduino

# Enable logging
logger:

remote_transmitter:
  pin: GPIO25 #### ESP32
  # RF uses a 100% carrier signal
  carrier_duty_percent: 100%

button:
  - platform: template
    name: "Brightness Up"
    on_press:
      - remote_transmitter.transmit_raw:
          code: [8800, -4400,
                1024, -3072, 1024, -3072, 1024, -3072, 1024, -3072,   1024, -3072, 1024, -3072,  1024, -3072, 1024, -3072,
                1024, -1024, 1024, -1024, 1024, -1024, 1024, -1024,   1024, -3072, 1024, -3072,  1024, -3072, 1024, -3072,
                1024, -1024, 1024, -1024, 1024, -1024, 1024, -1024,   1024, -1024, 1024, -1024,  1024, -1024, 1024, -3072,
                1024, -3072, 1024, -3072, 1024, -3072, 1024, -3072,   1024, -3072, 1024, -3072,  1024, -3072, 1024, -1024
                ]
          repeat:
            times: 6
            wait_time: 0.0s
  - platform: template
    name: "Brightness Down"
    on_press:
      - remote_transmitter.transmit_raw:
          code: [8800, -4400,
                1024, -3072, 1024, -3072,  1024, -3072, 1024, -3072,   1024, -3072, 1024, -3072,  1024, -3072, 1024, -3072,
                1024, -1024, 1024, -1024,  1024, -1024, 1024, -1024,   1024, -3072, 1024, -3072,  1024, -3072, 1024, -3072,
                1024, -1024, 1024, -1024,  1024, -1024, 1024, -1024,   1024, -1024, 1024, -1024,  1024, -1024, 1024, -1024,
                1024, -3072, 1024, -3072,  1024, -3072, 1024, -3072,   1024, -3072, 1024, -3072,  1024, -3072, 1024, -3072
                ]
          repeat:
            times: 6
            wait_time: 0.0s
  - platform: template
    name: "Color"
    on_press:
      - remote_transmitter.transmit_raw:
          code: [8800, -4400,
                1024, -3072, 1024, -3072,  1024, -3072, 1024, -3072,   1024, -3072, 1024, -3072,  1024, -3072, 1024, -3072,
                1024, -1024, 1024, -1024,  1024, -1024, 1024, -1024,   1024, -3072, 1024, -3072,  1024, -3072, 1024, -3072,
                1024, -1024, 1024, -1024,  1024, -1024, 1024, -1024,   1024, -1024, 1024, -1024,  1024, -3072, 1024, -3072,
                1024, -3072, 1024, -3072,  1024, -3072, 1024, -3072,   1024, -3072, 1024, -3072,  1024, -1024, 1024, -1024
                ]
          repeat:
            times: 6
            wait_time: 0s
  - platform: template
    name: "Clear"
    on_press:
      - remote_transmitter.transmit_raw:
          code: [8800, -4400,
                1024, -3072, 1024, -3072,  1024, -3072, 1024, -3072,   1024, -3072, 1024, -3072,  1024, -3072, 1024, -3072,
                1024, -1024, 1024, -1024,  1024, -1024, 1024, -1024,   1024, -3072, 1024, -3072,  1024, -3072, 1024, -3072,
                1024, -1024, 1024, -1024,  1024, -1024, 1024, -1024,   1024, -1024, 1024, -3072,  1024, -1024, 1024, -1024,
                1024, -3072, 1024, -3072,  1024, -3072, 1024, -3072,   1024, -3072, 1024, -1024,  1024, -3072, 1024, -3072
                ]
          repeat:
            times: 6
            wait_time: 0s
  - platform: template
    name: "Color and Clear"
    on_press:
      - remote_transmitter.transmit_raw:
          code: [8800, -4400,
                1024, -3072, 1024, -3072,  1024, -3072, 1024, -3072,   1024, -3072, 1024, -3072,  1024, -3072, 1024, -3072,
                1024, -1024, 1024, -1024,  1024, -1024, 1024, -1024,   1024, -3072, 1024, -3072,  1024, -3072, 1024, -3072,
                1024, -1024, 1024, -1024,  1024, -1024, 1024, -1024,   1024, -1024, 1024, -3072,  1024, -1024, 1024, -3072,
                1024, -3072, 1024, -3072,  1024, -3072, 1024, -3072,   1024, -3072, 1024, -1024,  1024, -3072, 1024, -1024
                ]
          repeat:
            times: 6
            wait_time: 0s
  - platform: template
    name: "Tree Off"
    on_press:
      - remote_transmitter.transmit_raw:
          code: [8800, -4400,
                1024, -3072, 1024, -3072,  1024, -3072, 1024, -3072,   1024, -3072, 1024, -3072,  1024, -3072, 1024, -3072,
                1024, -1024, 1024, -1024,  1024, -1024, 1024, -1024,   1024, -3072, 1024, -3072,  1024, -3072, 1024, -3072,
                1024, -1024, 1024, -1024,  1024, -1024, 1024, -1024,   1024, -1024, 1024, -1024,  1024, -3072, 1024, -1024,
                1024, -3072, 1024, -3072,  1024, -3072, 1024, -3072,   1024, -3072, 1024, -3072,  1024, -1024, 1024, -3072,
                ]
          repeat:
            times: 6
            wait_time: 0s
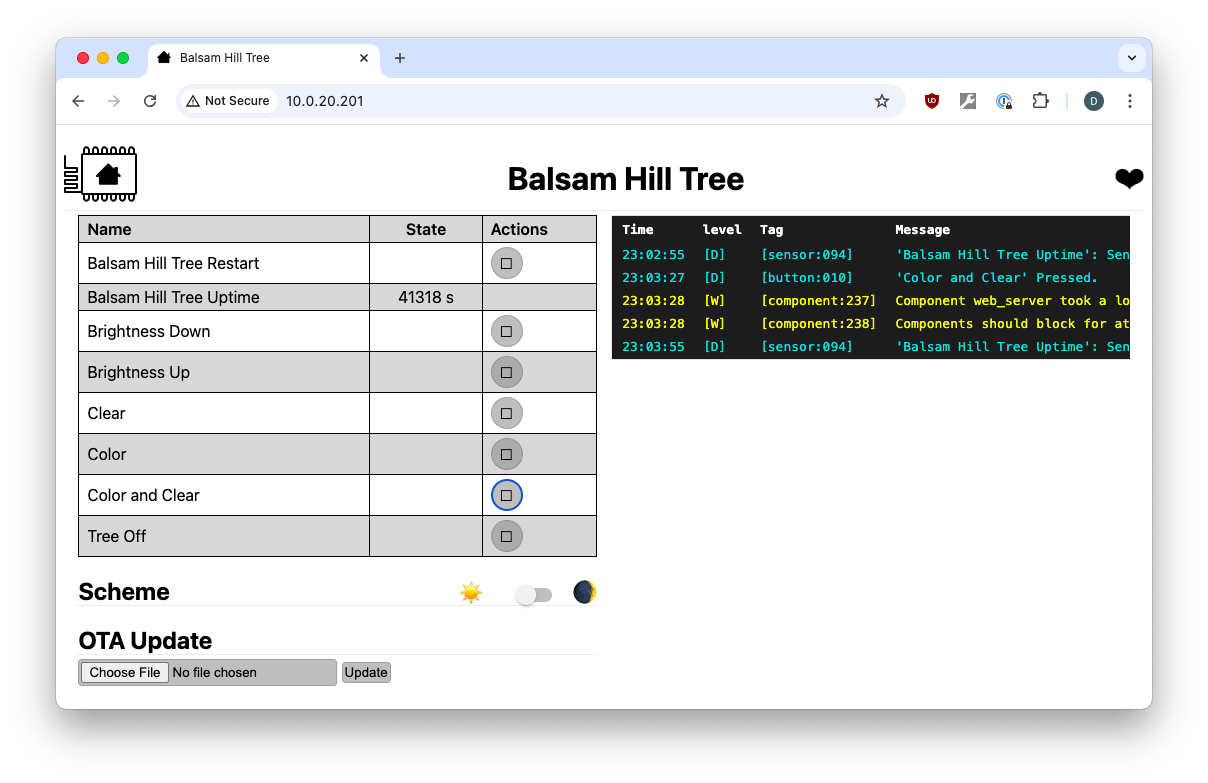
I flashed the resulting firmware to the NodeMCU, brought up its web UI in another tab in Chrome, and started pressing buttons. To my great satisfaction, it worked perfectly!
OpenHAB
With the transmitter working, I turned to OpenHAB. As of this writing, I am currently running OpenHAB 4.3-M4 and using the unofficial ESPHome Native API binding (mqtt would also work, but the native binding is a easier to work with IMHO).
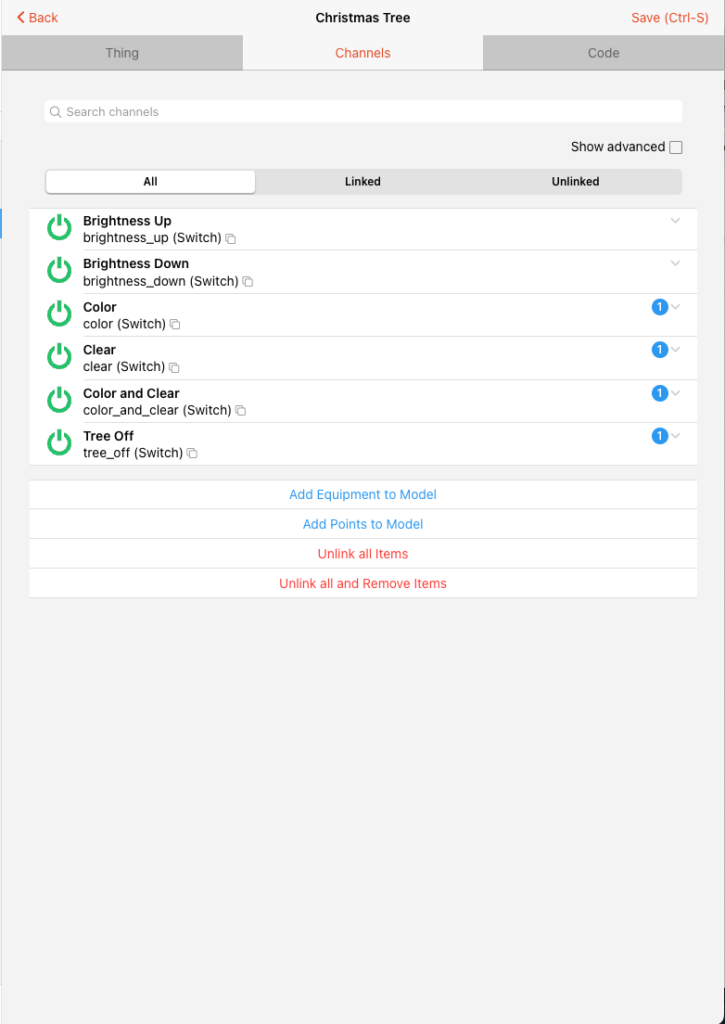
Here is what I ended up with for my Thing:
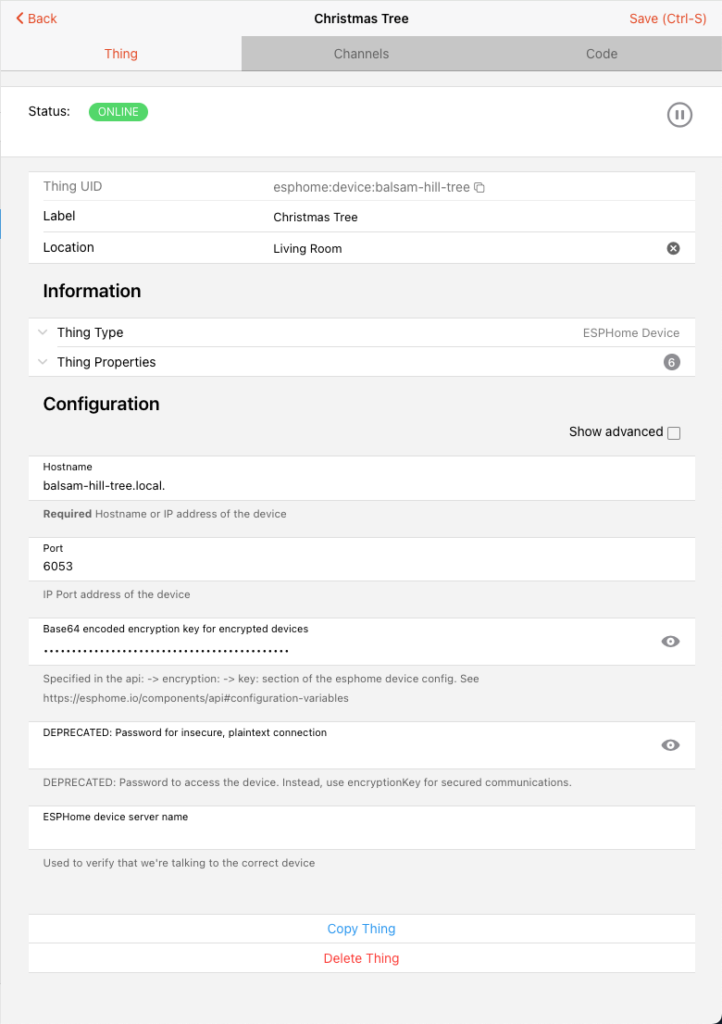
And if you prefer the code form:
UID: esphome:device:balsam-hill-tree
label: Christmas Tree
thingTypeUID: esphome:device
configuration:
  pingInterval: 10
  hostname: balsam-hill-tree.local.
  encryptionKey: *******************
  port: 6053
  maxPingTimeouts: 4
  deviceLogLevel: NONE
location: Living Room
channels:
  - id: balsam_hill_tree_uptime
    channelTypeUID: esphome:7821849acd80-uptimebalsam-hill-tree
    label: Balsam Hill Tree Uptime
    configuration:
      deviceClass: duration
      unit: s
      command_key: -470552575
  - id: balsam_hill_tree_restart
    channelTypeUID: esphome:balsam-hill-treebuttonbalsam_hill_tree_restartbalsam-hill-tree
    label: Balsam Hill Tree Restart
    configuration:
      command_class: Button
      command_key: 1234655258
  - id: brightness_up
    channelTypeUID: esphome:balsam-hill-treebuttonbrightness_upbalsam-hill-tree
    label: Brightness Up
    configuration:
      command_class: Button
      command_key: 174441068
  - id: brightness_down
    channelTypeUID: esphome:balsam-hill-treebuttonbrightness_downbalsam-hill-tree
    label: Brightness Down
    configuration:
      command_class: Button
      command_key: 1524532395
  - id: color
    channelTypeUID: esphome:balsam-hill-treebuttoncolorbalsam-hill-tree
    label: Color
    configuration:
      command_class: Button
      command_key: -1340651302
  - id: clear
    channelTypeUID: esphome:balsam-hill-treebuttonclearbalsam-hill-tree
    label: Clear
    configuration:
      command_class: Button
      command_key: 1754255536
  - id: color_and_clear
    channelTypeUID: esphome:balsam-hill-treebuttoncolor_and_clearbalsam-hill-tree
    label: Color and Clear
    configuration:
      command_class: Button
      command_key: -1114174910
  - id: tree_off
    channelTypeUID: esphome:balsam-hill-treebuttontree_offbalsam-hill-tree
    label: Tree Off
    configuration:
      command_class: Button
      command_key: -105938685
I didn’t really care about being able to control the brightness, so I left those two channels alone, but for the others I just created items in the GUI for each of them with the default names.
I then created a dummy item of type String to store the current setting, which I settled on calling the “Mode” it was in.
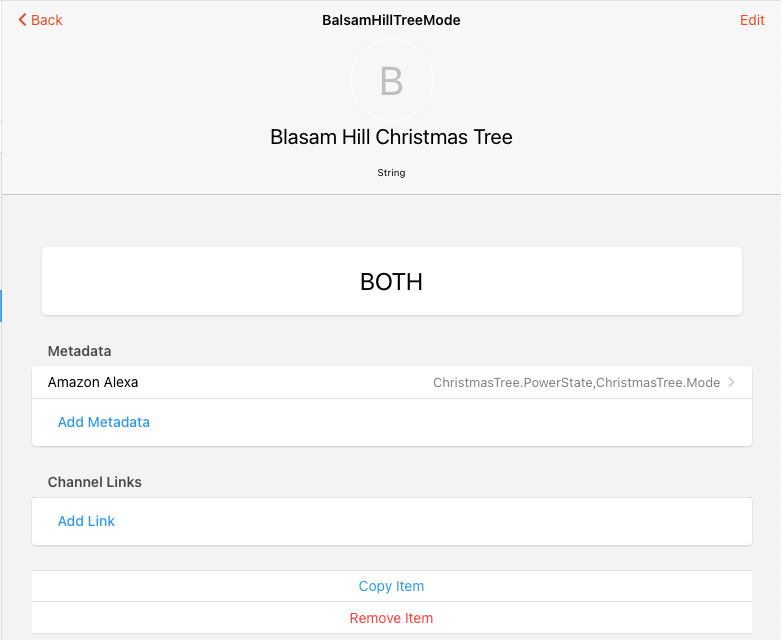
Next, in the Pages area, I went to the existing Sitemap for the room the tree is set up in and added a new widget of type Switch for that dummy item, with four mappings:
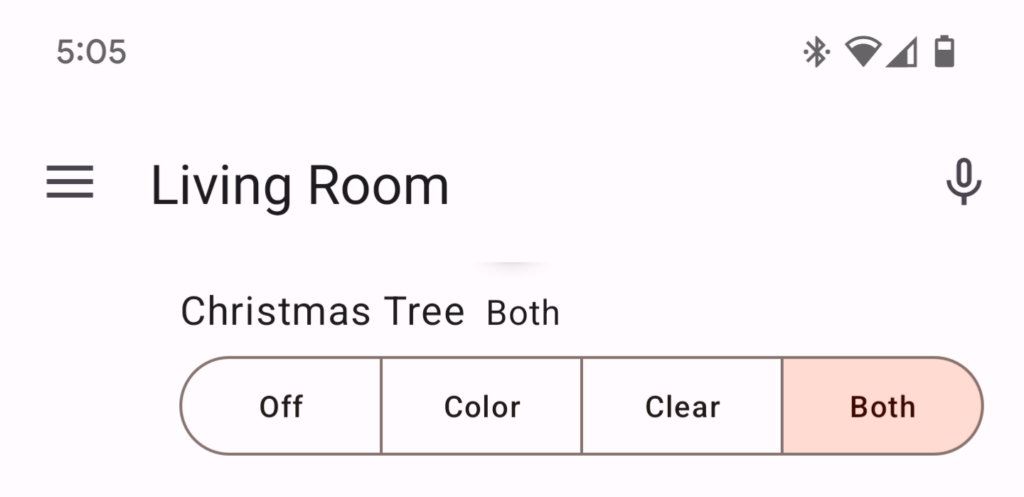
Switch item=BalsamHillTreeMode mappings=[OFF=Off, COLOR=Color, CLEAR=Clear, BOTH=Both] label="Christmas Tree"
And this is what it looks like in the Android app:
I then set up a simple rule to activate the correct button in ESPHome depending on what mapping was pressed in the Sitemap. It was pretty easy:
The Javascript for the action script is thus:
if(event.itemCommand !== undefined){
  console.log("Balsam Hill Tree received command: " + event.itemCommand.toString());

  switch(event.itemCommand.toString()) {
    case "OFF":
      items.Christmas_Tree_Tree_Off.sendCommand("ON");
      break;
    case "COLOR":
      items.Christmas_Tree_Color.sendCommand("ON");
      break;
    case "CLEAR":
      items.Christmas_Tree_Clear.sendCommand("ON");
      break;
    case "BOTH":
      items.Christmas_Tree_Color_and_Clear.sendCommand("ON");
      break;
    default:
      break;
  }
}
Alexa Integration
Finally, I went back to the dummy item and added some Amazon Alexa Metadata so we could control the tree using the plethora of Alexa devices in our house:
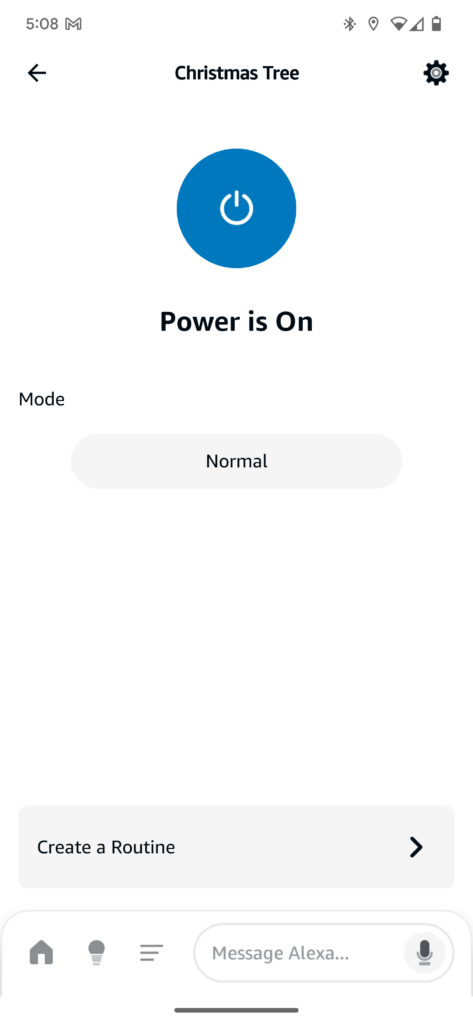
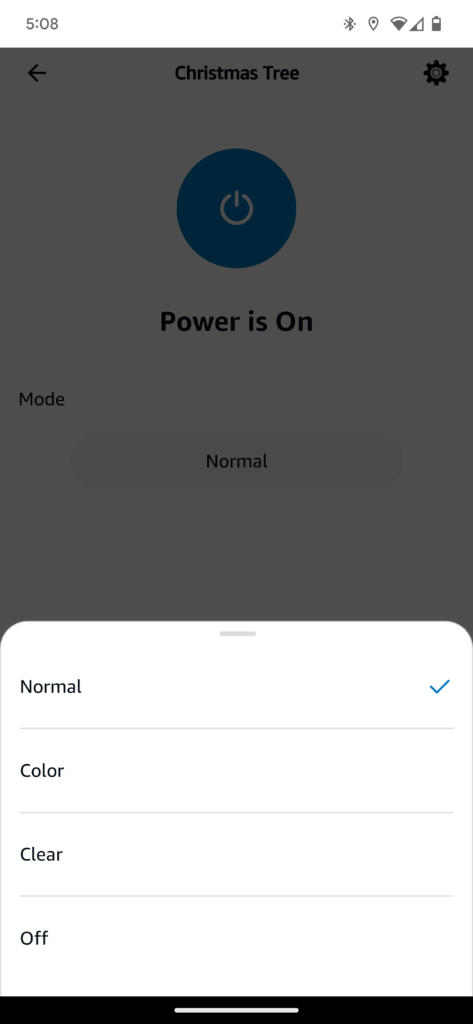
One thing I want to call out here is that it has two Alexa attributes: ChristmasTree.PowerState and ChristmasTree.Mode (FYI, ChristmasTree is basically an alias for Light). This allows us to say “Alexa, turn [on|off] the Christmas Tree” and also say “Alexa, set the Christmas Tree to [Off|Normal|Color|Clear]”, so that the commands are more natural. My wife prefers the “Color & Clear” mode, so I decided to call that the “Normal” mode and set the tree to that mode when it receives the “ON” command.
I then said “Alexa, discover my devices” and a couple minutes later I had a new device in my Alexa app:
State Tracking
One thing to note: if someone uses the remote or the physical controller itself, OpenHAB doesn’t know about that. Our physical controller is hiding under the tree skirt, so that’s not really an issue. I had hoped I’d be able to use a 433 MHz receiver in ESPHome to pick up any commands from the real remote, and use that to make the state in OpenHAB properly follow the actual tree state. But since the command protocol didn’t map to any existing decoders in the remote_receiver component, and all the modes have discrete buttons, I decided not to spend any time on it. (If the controller or remote had just a single button that cycled through all the modes, then yeah, I’d have to figure out something to track state, but luckily that wasn’t the case for our tree.)
Done! (?)
After confirming the app controlled the tree as expected, and that the voice commands all worked as expected, I patted myself on the back and went to brag about my success on my Facebook page.
Finishing Touches
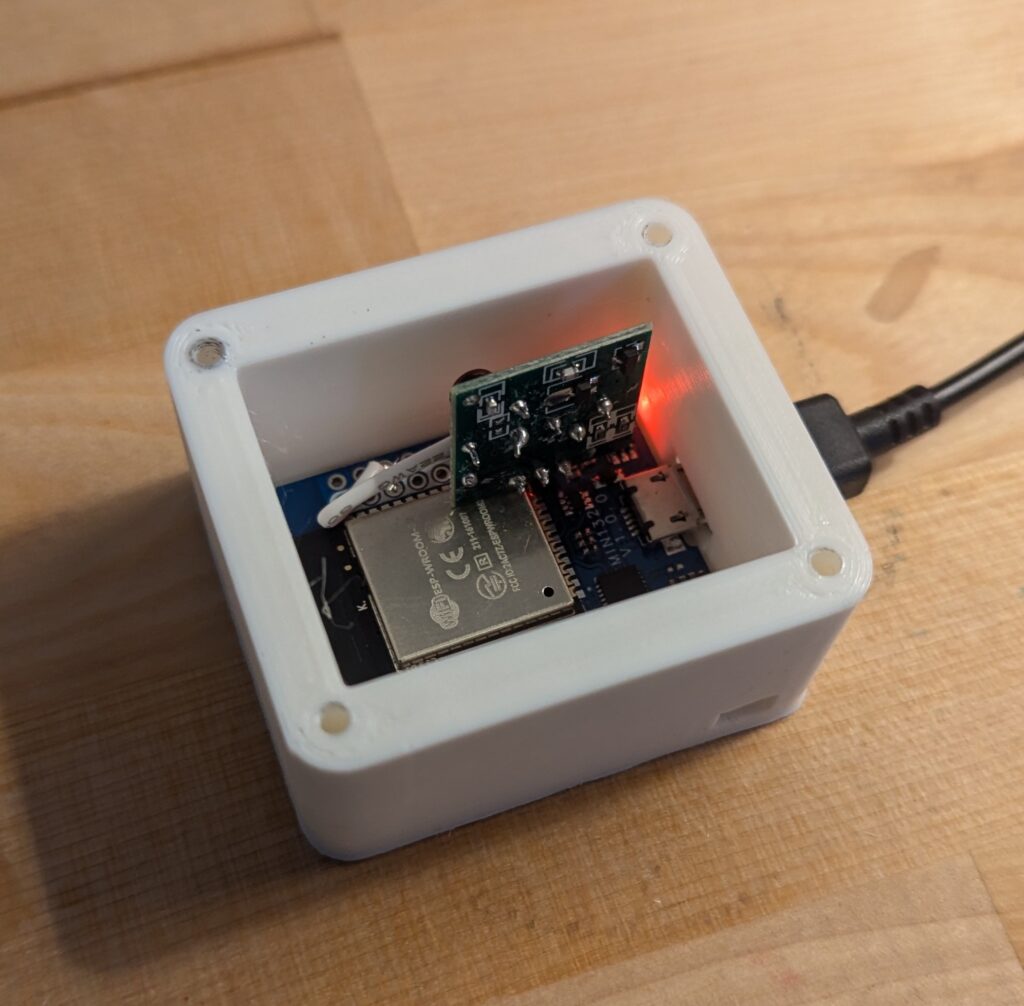
A few days later, after I was satisfied that everything was working the way I wanted it to, it was time to make it tidy and improve the wife acceptance factor. I had used a NodeMCU ESP32s initially, because it’s what I found first in my microcontroller stash (plus it had header pins on it already, so I used Dupont cables to connect the receiver and transmitter while developing the YAML config). But for the final iteration, I switched to an Wemos D1 ESP32 module I subsequently found I connected the transmitter board to the Wemos board. It would have been nice if I could have just placed the pins on the transmitter into three consecutive holes on the Wemos board, but alas, the VCC and GND pins were reversed from the order of pins on the Wemos. So instead I bent the data pin sideways, inserted the VCC and GND pins into the board and soldered them, and then soldered a short jumper from the data pin over to the GPIO pin I wanted to use on the Wemos. You can kind of see that in the picture below, but unfortunately I forgot to take a better picture before putting it in the case.
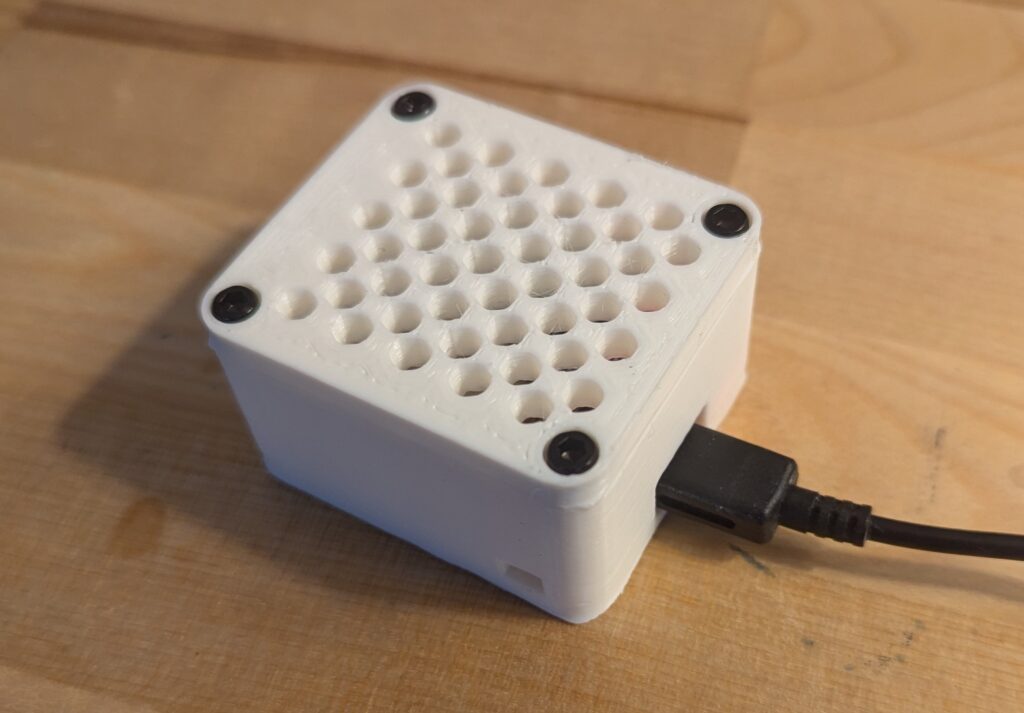
Satisfied with my soldering (and re-testing, of course), I searched Printables.com and found a little case for my transmitter setup. It was a bit too short, but fortunately the designer had provided the OpenSCAD source file for the model, so it was fairly straightforward to modify to be taller.
- Original Case: Case for Wemos ESP32 D1 Mini
- My Remix: Wemos D1 ESP32 Case (Taller Remix)
Hey Dave, I really like this project and I appreciate that you also told the stuffs you tried but could not get to work with this remote (others might find these very helpful!), and a big thank you for sharing the details of the home automation parts, too! I use Domoticz but I wanted to try OpenHAB and ESPHome for a while now – maybe this was the last nudge to do so 🙂 Also, I am glad you found my post useful. Great project, just as great blog post about it 🙂 Happy holidays! Gabor
Thank you for your work and the kind words! (Just now catching up on comments, but happy holidays to you as well.)
Hey Dave! In what appears to be a case of simultaneous invention. I spent December figuring out the same automation for my Balsam Hill tree as you did. I had my “eureka, it works!” moment the same day you published this. Looks like our ESPHome configs are basically the same!
https://zerowidth.com/2025/reverse-engineering-my-christmas-tree/
Haha, that’s amazing. I love how we both followed almost the exact same process.
One thing I didn’t mention was that I briefly considered making a quick-and-dirty sound card oscilloscope of my own to go that route, but I didn’t have anything with a true line-in, looked online for some USB options, and eventually (finally) remembered I had the RTL-SDR.
I’m trying to get your Balsam Hill Automation working in Home Assistant… I’m running into just a few issues.
First, I get errors from the “include” statements in Device Builder, are those supposed to be included in a standard library, or are they standard files you use? If the latter, do you mind sharing.
Second, Any reason you didn’t use GPIO22 instead of GPIO25? I modified your script to use 22, because it made setting up on a breadboard easier. Seems like it should be fine, but maybe I’m missing something.
“`
esphome:
name: christmas-tree-controller
friendly_name: Christmas Tree Controller
esp32:
board: wemos_d1_mini32
framework:
type: arduino
# Enable logging
logger:
# Enable Home Assistant API
api:
encryption:
key: “Ygoi7qiejHuOKRl5ki4aqiwXJCDhCJeAb9g6pRGVJVo=”
ota:
– platform: esphome
password: “2100e703136c3c76b0d8b69eb878bcf7”
wifi:
ssid: !secret wifi_ssid
password: !secret wifi_password
# Enable fallback hotspot (captive portal) in case wifi connection fails
ap:
ssid: “Christmas-Tree-Controller”
password: “YUwj5JLjevBl”
captive_portal:
remote_transmitter:
pin: GPIO22 #### ESP32
# RF uses a 100% carrier signal
carrier_duty_percent: 100%
button:
– platform: template
name: “Brightness Up”
on_press:
– remote_transmitter.transmit_raw:
code: [8800, -4400,
1024, -3072, 1024, -3072, 1024, -3072, 1024, -3072, 1024, -3072, 1024, -3072, 1024, -3072, 1024, -3072,
1024, -1024, 1024, -1024, 1024, -1024, 1024, -1024, 1024, -3072, 1024, -3072, 1024, -3072, 1024, -3072,
1024, -1024, 1024, -1024, 1024, -1024, 1024, -1024, 1024, -1024, 1024, -1024, 1024, -1024, 1024, -3072,
1024, -3072, 1024, -3072, 1024, -3072, 1024, -3072, 1024, -3072, 1024, -3072, 1024, -3072, 1024, -1024
]
repeat:
times: 6
wait_time: 0.0s
– platform: template
name: “Brightness Down”
on_press:
– remote_transmitter.transmit_raw:
code: [8800, -4400,
1024, -3072, 1024, -3072, 1024, -3072, 1024, -3072, 1024, -3072, 1024, -3072, 1024, -3072, 1024, -3072,
1024, -1024, 1024, -1024, 1024, -1024, 1024, -1024, 1024, -3072, 1024, -3072, 1024, -3072, 1024, -3072,
1024, -1024, 1024, -1024, 1024, -1024, 1024, -1024, 1024, -1024, 1024, -1024, 1024, -1024, 1024, -1024,
1024, -3072, 1024, -3072, 1024, -3072, 1024, -3072, 1024, -3072, 1024, -3072, 1024, -3072, 1024, -3072
]
repeat:
times: 6
wait_time: 0.0s
– platform: template
name: “Color”
on_press:
– remote_transmitter.transmit_raw:
code: [8800, -4400,
1024, -3072, 1024, -3072, 1024, -3072, 1024, -3072, 1024, -3072, 1024, -3072, 1024, -3072, 1024, -3072,
1024, -1024, 1024, -1024, 1024, -1024, 1024, -1024, 1024, -3072, 1024, -3072, 1024, -3072, 1024, -3072,
1024, -1024, 1024, -1024, 1024, -1024, 1024, -1024, 1024, -1024, 1024, -1024, 1024, -3072, 1024, -3072,
1024, -3072, 1024, -3072, 1024, -3072, 1024, -3072, 1024, -3072, 1024, -3072, 1024, -1024, 1024, -1024
]
repeat:
times: 6
wait_time: 0s
– platform: template
name: “Clear”
on_press:
– remote_transmitter.transmit_raw:
code: [8800, -4400,
1024, -3072, 1024, -3072, 1024, -3072, 1024, -3072, 1024, -3072, 1024, -3072, 1024, -3072, 1024, -3072,
1024, -1024, 1024, -1024, 1024, -1024, 1024, -1024, 1024, -3072, 1024, -3072, 1024, -3072, 1024, -3072,
1024, -1024, 1024, -1024, 1024, -1024, 1024, -1024, 1024, -1024, 1024, -3072, 1024, -1024, 1024, -1024,
1024, -3072, 1024, -3072, 1024, -3072, 1024, -3072, 1024, -3072, 1024, -1024, 1024, -3072, 1024, -3072
]
repeat:
times: 6
wait_time: 0s
– platform: template
name: “Color and Clear”
on_press:
– remote_transmitter.transmit_raw:
code: [8800, -4400,
1024, -3072, 1024, -3072, 1024, -3072, 1024, -3072, 1024, -3072, 1024, -3072, 1024, -3072, 1024, -3072,
1024, -1024, 1024, -1024, 1024, -1024, 1024, -1024, 1024, -3072, 1024, -3072, 1024, -3072, 1024, -3072,
1024, -1024, 1024, -1024, 1024, -1024, 1024, -1024, 1024, -1024, 1024, -3072, 1024, -1024, 1024, -3072,
1024, -3072, 1024, -3072, 1024, -3072, 1024, -3072, 1024, -3072, 1024, -1024, 1024, -3072, 1024, -1024
]
repeat:
times: 6
wait_time: 0s
– platform: template
name: “Tree Off”
on_press:
– remote_transmitter.transmit_raw:
code: [8800, -4400,
1024, -3072, 1024, -3072, 1024, -3072, 1024, -3072, 1024, -3072, 1024, -3072, 1024, -3072, 1024, -3072,
1024, -1024, 1024, -1024, 1024, -1024, 1024, -1024, 1024, -3072, 1024, -3072, 1024, -3072, 1024, -3072,
1024, -1024, 1024, -1024, 1024, -1024, 1024, -1024, 1024, -1024, 1024, -1024, 1024, -3072, 1024, -1024,
1024, -3072, 1024, -3072, 1024, -3072, 1024, -3072, 1024, -3072, 1024, -3072, 1024, -1024, 1024, -3072,
]
repeat:
times: 6
wait_time: 0s
“`
I honestly don’t remember why I picked that particular GPIO. Might have been related to the physical layout of my board, but maybe not. It shouldn’t make much difference, though.
Those two includes are where I put most of my standard stuff. It’s just how I’ve chosen to modularize my configuration and keep things consistent across all my devices. Here they are for your reference:
# common/common.yamlpackages:
esphome: !include esphome.yaml
logger: !include logger.yaml
mqtt: !include mqtt.yaml
button:
- platform: restart
name: "${friendly_name} Restart"
api:
reboot_timeout: 0s
sensor:
- platform: uptime
name: "${friendly_name} Uptime"
# common/network.yamlpackages:
network_base: !include network-base.yaml
wifi:
# https://esphome.io/components/wifi
ssid: !secret wifi_ssid
password: !secret wifi_password
use_address: ${device_name}.smarthome.davecorder.org # I use this to add a custom domain instead of using the default .local
domain: .smarthome.davecorder.org
fast_connect: true
# Enable fallback hotspot (captive portal) in case wifi connection fails
ap:
ssid: "${friendly_name}"
password: !secret esphome_ap_password
captive_portal:
# this section intentionally left blank
Those, in turn, have other includes, including:
# common/network-base.yaml# Enable Home Assistant API
api:
# https://esphome.io/components/api
# password: !secret api_password
encryption:
key: !secret api_encryption_key
ota:
# https://esphome.io/components/ota
platform: esphome
password: !secret ota_password
# Enable Web server.
web_server:
port: 80
js_url: http://majel.davecorder.org:6052/static/js/esphome/www.js
# auth:
# username: !secret web_username
# password: !secret web_password
# common/esphome.yamlesphome:
name: ${device_name}
friendly_name: ${friendly_name}
# common/logger.yamllogger:
# intentionally blank
# cat common/mqtt.yamlmqtt:
broker: majel.davecorder.org
username: !secret mqtt_username
password: !secret mqtt_password
discovery: false
Turns out the issue was me reversing signal and VCC. The way they labelled my transmitter was dumb. One burned out transmitter later, and it was all working great, but range was limited. I upgraded my setup to the transmitter below. You need an additional enable pin that turns the internal amplifier on and off (esphome docs for remotetransmitter have directions for that). Sniffing with my RTL-SDR, the tuned frequency is closer to that of the remote than the cheap aliexpress modules I started with. Whether it’s the amplifier in the new module, the longer antenna that comes with it, or the better tuning (or a combination of all of them). I am getting dramatically better reliability, and much further transmission distances with the new module.
https://www.amazon.com/dp/B0BLTSSMXH?ref=ppx_yo2ov_dt_b_fed_asin_title
I also made some readability improvements to the codebase using includes and `transmit_rc_switch_raw`.
#christmas_tree_button.yaml
– remote_transmitter.transmit_rc_switch_raw:
code: ${button_code}
protocol:
pulse_length: 100
sync:
– 88
– 44
zero:
– 10
– 30
one:
– 10
– 10
repeat:
times: 6
wait_time: 0.0s
# relevant portion of christmas-tree-controller.yaml
button:
– platform: template
name: ‘Brighter’
on_press: !include {file: christmas-tree-button.yaml, vars: {button_code: ‘00000000111100001111111000000001’} }
– platform: template
name: ‘Dimmer’
on_press: !include {file: christmas-tree-button.yaml, vars: {button_code: ‘00000000111100001111111100000000’} }
– platform: template
name: ‘Color’
on_press: !include {file: christmas-tree-button.yaml, vars: {button_code: ‘00000000111100001111110000000011’} }
– platform: template
name: ‘Clear’
on_press: !include {file: christmas-tree-button.yaml, vars: {button_code: ‘00000000111100001111101100000100’} }
– platform: template
name: ‘Color and Clear’
on_press: !include {file: christmas-tree-button.yaml, vars: {button_code: ‘00000000111100001111101000000101’} }
– platform: template
name: ‘Off’
on_press: !include {file: christmas-tree-button.yaml, vars: {button_code: ‘00000000111100001111110100000010’} }